7 Mac Tips and Tricks You Might Not Know

36 years ago Steve Jobs launched the first Macintosh computer - a 17 pound iconic machine that provides word processors, graphical interfaces and a mouse. When Macintosh was launched, it was seen as Apple's last chance to break through IBM's dominance in the PC market and became a major player in the PC industry. Now Apple has become one of the world's leading PC suppliers.
![]()
With the growth of Apple, the Mac produced by Apple is adopted so many advanced technologies, and many of its usages are different from Windows system. It can be a hassle at first, but after learning a few tricks, you'll find the macOS is quite useful and convenient. So today, some basic and helpful Mac tips would be introduced to Mac users.
Trick 1. Easily Download Online Videos to Mac
There are a lot of fun watching all sorts of videos online. Also, it’s a trend of the world now. Videos are more vivid than images as well as more real than words. Some of the most popular video streaming sites are known as YouTube, Dailymotion, Facebook, Instagram, Vlive, and so on. However, none of them allows users to grasp the video.
So, what happen if you just love a video so much and want to collect it?
Would you just give up? I bet you wouldn’t.
Here let me show you an easiest and hassle-free way to download online videos from all sites you want!
Please allow me to introduce VideoHunter.
VideoHunter is an intuitive video downloader and converter for Mac users. It has a free trial as well as a paid version for you to choose from. If you just want to download YouTube videos to Mac, it’s okay to stick with the free version.
Now, let’s start figuring out how it works!
STEP 1. Download and Install VideoHunter.
STEP 2. Select ‘Downloader’ to proceed.
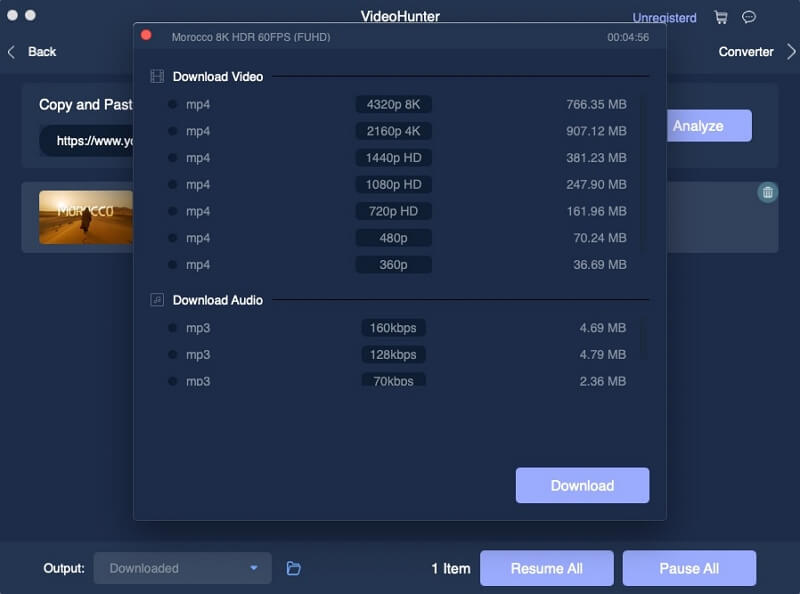
STEP 3. Paste the video link and start analyzing the url.
STEP 4. Select a desired option of quality and format to download the video.
Note: Now you can freely use the converter along!
Trick 2. Capture Mac Screen Activities
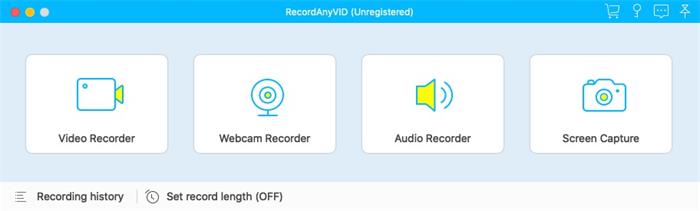
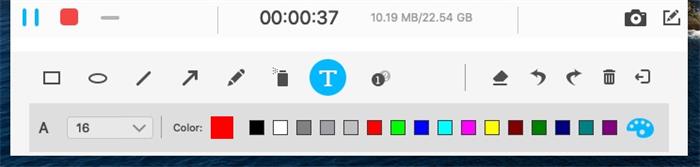
RecordAnyVid is a special tool for recording screen activities. It can easily record Mac screen, including videos, sounds, mouse movements, etc. In addition, it also has the functions of real-time playback and video editing. You can output the recording to various formats using RecordAnyVid, which is regarded as one of the best recorders today.

STAR FEATURES OF RECORDANYVID
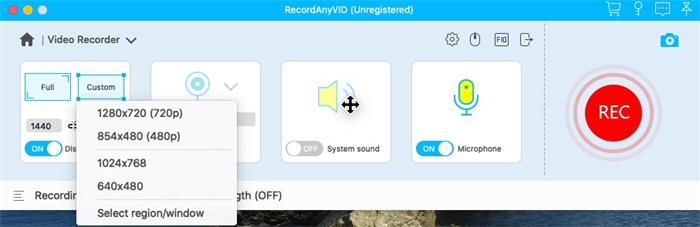
- Support custom recording screen or screenshot area. Users can select the full screen or selected specific area for capturing.
- Four capturing modes are available: Video Recorder, Webcam Recorder, Audio Recorder, Screen Capture.
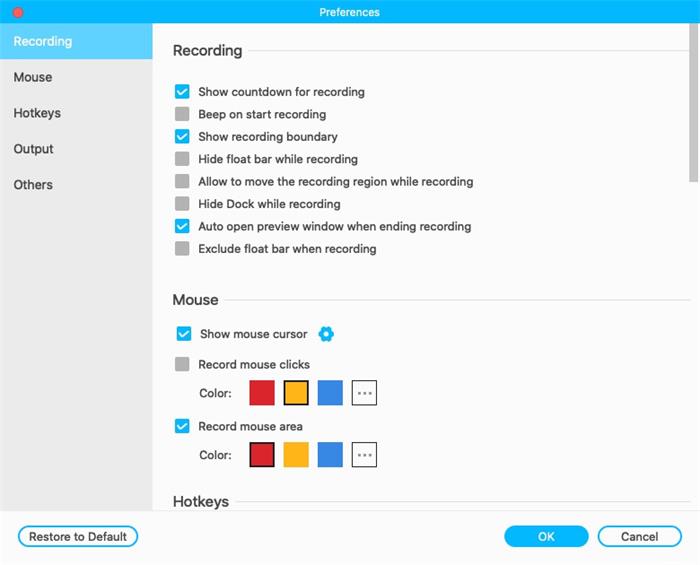
- Support to enable visual or hide mouse cursor movement track.
- You are free to enable or disable recording audio of the system or connected microphone.
- Versatile and convenient editor: add text, arrow, line and draw on the video or screenshot.
After all, this is a software that can only be tested by practice. If you want to start recording your Mac screen, download RecordAnyVid right now. The software tutorial is also prepared for you below.

It's easy to capture a Mac screen with RecordAnyVid , and you can try it.
Trick 3. Show Password Hint on the Login Screen
When awake the login interface of Mac, if you input the wrong password three times in succession, or click the question mark in the password column, the prompt message will be displayed.
A password hint can help you recall your password and avoid wasting time trying to use your Mac because you forgot it. Next, we will show how you set your own Mac password hint step-by-step.
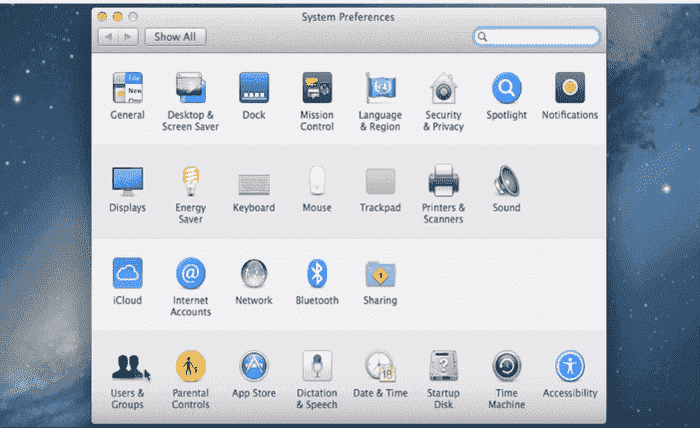
STEP 1. First click the Apple Logo Icon on the desktop, then click [System Preferences].
![]()
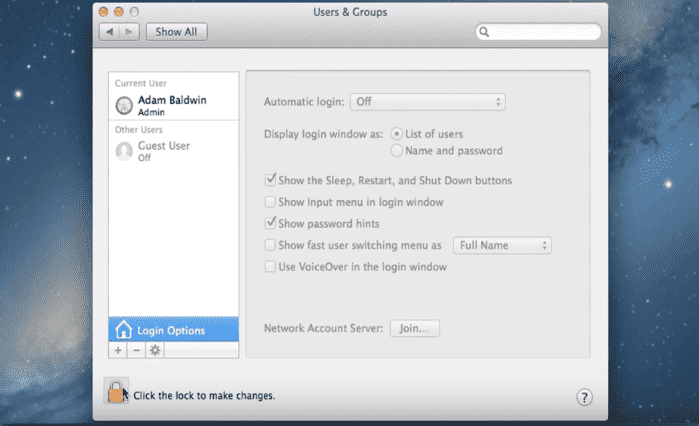
STEP 2. Click [Users & Group] after the System Preferences interface pops up.
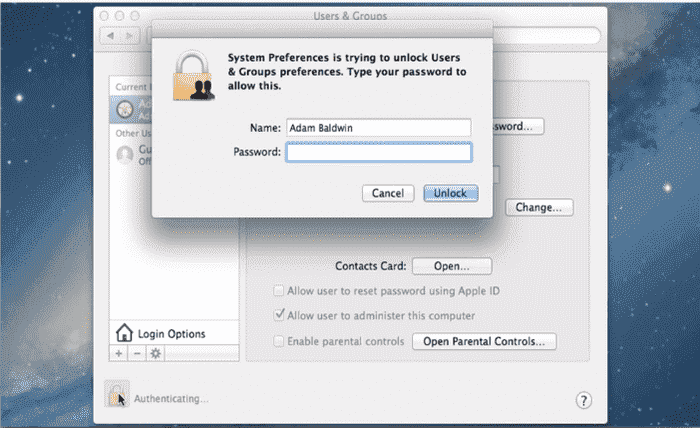
STEP 3. Click the lock icon in the lower left corner of Users & Group interface. Enter your password and click [Unlock].
STEP 4. Then click [Login Options] at the bottom left and check [Show password hints].
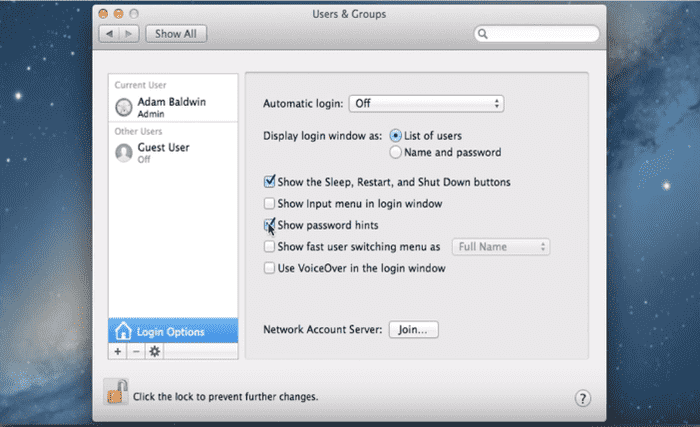
STEP 5. Finally, click [Lock] again to lock your changes.
Trick 4. Clear System Caches
Have you ever had the experience when your macOS pops up a warning tips that you have insufficient storage space, but actually, nothing is installed in the computer. Even if you painfully delete some personal files, only a few hundred MB of space will be released. Now, you can follow this cleanup tutorial to free more storage space for your Mac.
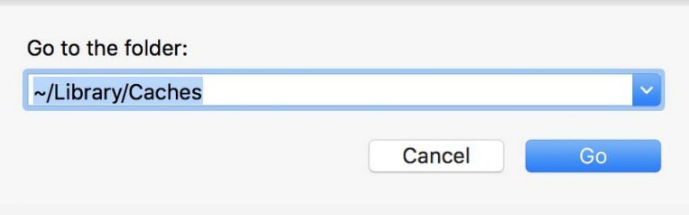
STEP 3. Open each folder and move all the files in it to the trash. You can use [Command + A] to select all the files at once.
Trick 5. Change Folder Colors
If you're tired of the default folder icon color matching in macOS X, let's learn how to change the color of folders in the Mac.
STEP 1. Create a new folder anywhere on the desktop and select the created folder.
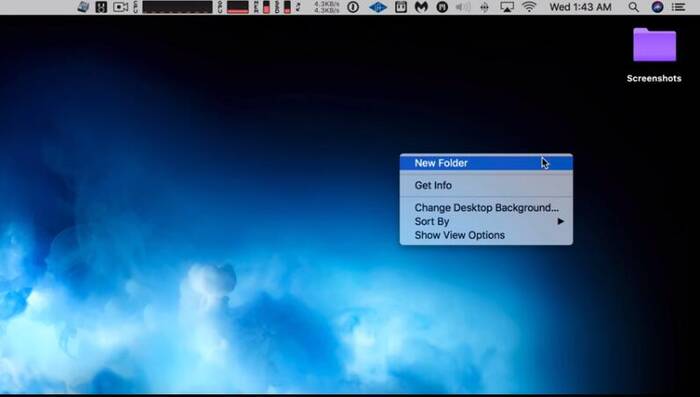
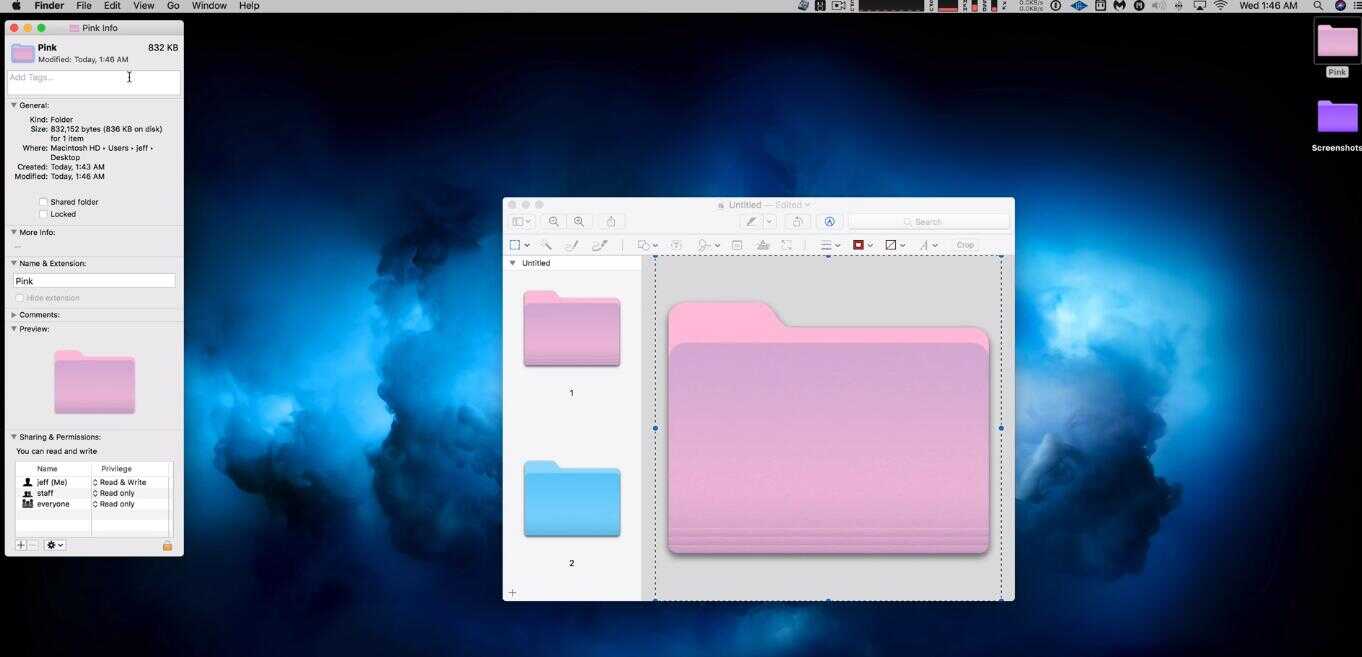
STEP 2. Right click the created folder, select [Get Info] to pop up the folder information interface, and click the folder icon in the upper left corner.
STEP 5. Click [New from Clipboard] under [File] in the menu bar.
STEP 7. Adjust the folder color as you want.
STEP 8. After adjustment, click [Select All] under [Edit], and then click [Copy] under [Edit] again.
STEP 9. Click the folder icon on the folder Info interface, and then click [Edit] > [Paste] to change the color.
Trick 6. Say Hi to Siri
Mac users can enable "Hey Siri" on their computers, allowing simple voice activation of virtual assistant, which is similar to that on iPhone, iPad or Apple watch. When we enable "Hey Siri" on Mac, we can interact with Siri completely using voice commands, without clicking to activate it. Just say the command after "Hey Siri" and Siri on the Mac will activate and respond. So, how to turn on "Hey Siri" on a Mac.
First, wake up Siri with "Hey Siri" on the Mac, which is currently applicable to some MAC models:
- Macbook Pro 2018 or later
- MacBook Air or 2018 newer or later
- iMac Pro
STEP 1. Go to the menu of Apple icon and select [System Preferences].
STEP 2. Scroll down and find the [Siri] icon.
STEP 3. Now in Siri window, tick to enable [Listen for Hey Siri].
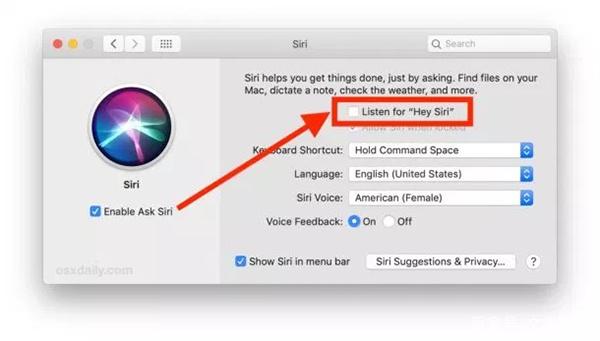
STEP 4. Click [Continue] to set up the "Hey Siri".
STEP 5. Complete the oral setup by repeating the command displayed on the screen.

STEP 6. When you have finished setting up the "Hey Siri", click [Done] and close the system preferences panel. Now you can use the "Hey Siri" feature to let it understand or command quickly.
Trick 7. Enable Dark Mode on Mac
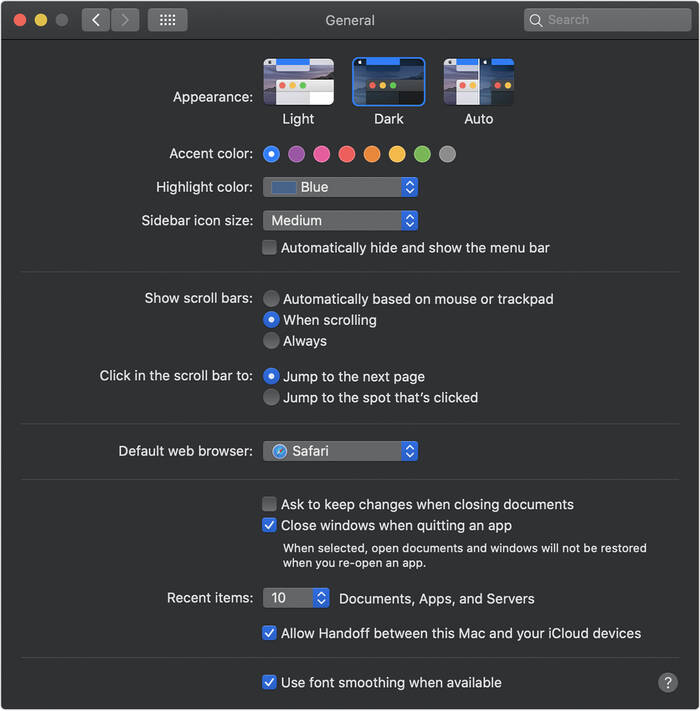
The Dark Mode introduced by macOS Mojave brings a better user experience. The Dark Mode available in Mojave or later, which is a new look that's good for the eyes and helps you focus on your work more easily. So how to turn on dark mode on Mac?

After reading the six Mac tips shared in this post, I believe you will get a lot. If there is anything unclear in the post, or there are more questions about Mac, you are welcome to share the options with us in the comment area.

Leave a Comment
* By clicking “Submit”, you agree to our terms of service, privacy policy and cookies policy.