VidPaw App
 Online Video Downloader


[iOS 13 Tips] Full Guide to Take Full Page Screenshots in iOS 13
Since Apple's iOS 13 system was updated, many functions have some changes, and there even a saying occurred - some features of iOS is getting approached to Android system such as the full page screenshots function. As an iPhone user, personally, I always admire this function on Android, but now Apple's iPhone and iPad can also take full page screenshots. I believe many people will use the screenshot function. But for some new users, they way need a guide to see how to take full page screenshots by using iOS 13? So today, I will show you in details.

CONTENTS
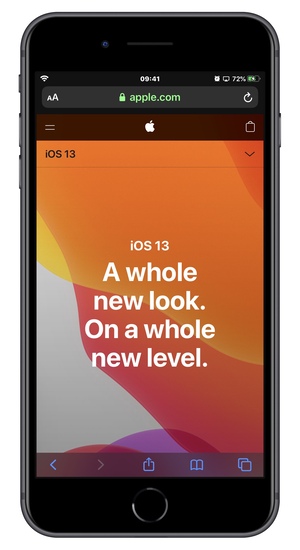
Part 1. How to Take a Full Page Screenshots in iOS13/ iPad OS
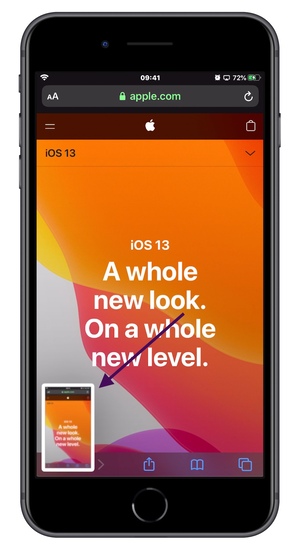
STEP 2. Then the thumbnail of the taken screenshot will appear in the lower left corner of the screen. Tap it to enter the screenshot editing page.
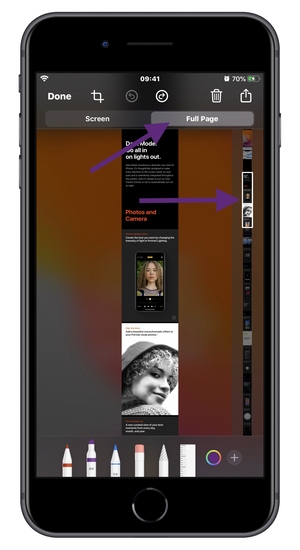
STEP 3. You will find that there is an additional [Full Page] option in the upper right corner. Tap it and you can slide the thumbnail sidebar on the right to preview the full screenshot. There are also some simple marking tools for you to freely use to edit the screenshot.
STEP 4. If you want to send the screenshot to others, you can tap the Share icon in the upper right corner in the screen and select Messages, Mail or other software to send to the user you want to share with. It should be noted that the format of this full screenshot is PDF.
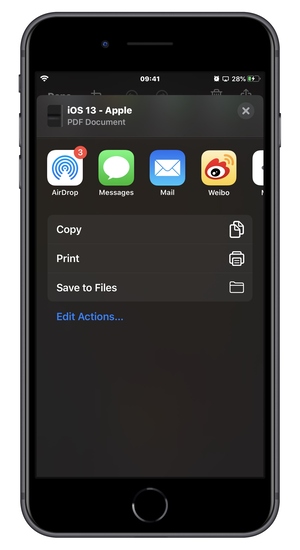
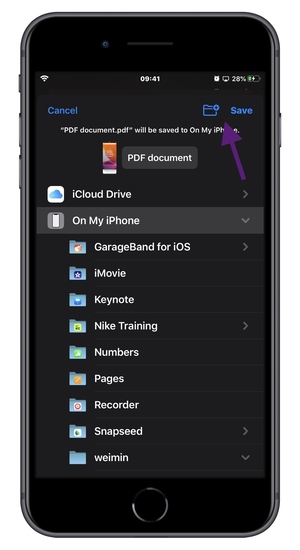
STEP 5. To save this full screenshot, you can select Save to Files option. Tap the folder icon in the upper right corner to create a special folder for saving full page screenshot on your iOS device or to the iCloud folder.
Is the full page screenshot function of the updated iOS 13 very simple to use? We should all know how to capture the screen quickly - just press the Side button and the Volume up button at the same time.
In fact, in the iPhone or iPad, there is a faster screenshots method, which is to use AssistiveTouch. In the next part, I'll introduce you to this wonderful tip of using AssistiveTouch on iPhone X/XS/XR/11 to screenshot. If you are interested, please read on!
Part 2. Easy Guide to Take a Screenshots on iPhone X/XS/XR/11
If you are a senior Apple user, "AssistiveTouch" must be your most familiar little partner. In the beginning, the small white circle on the screen was known and widely used for the maintenance of iPhone's real home button. With the continuous upgrading of iPhone system in recent years, the emergence of 3D touch has greatly reduced the loss of the home button. Full screen iPhones don't even have a home button. However, the function of [AssistiveTouch] has not stopped its development.
STEP 1. Open [Settings] of the iPhone, and slide to find [Accessibility].
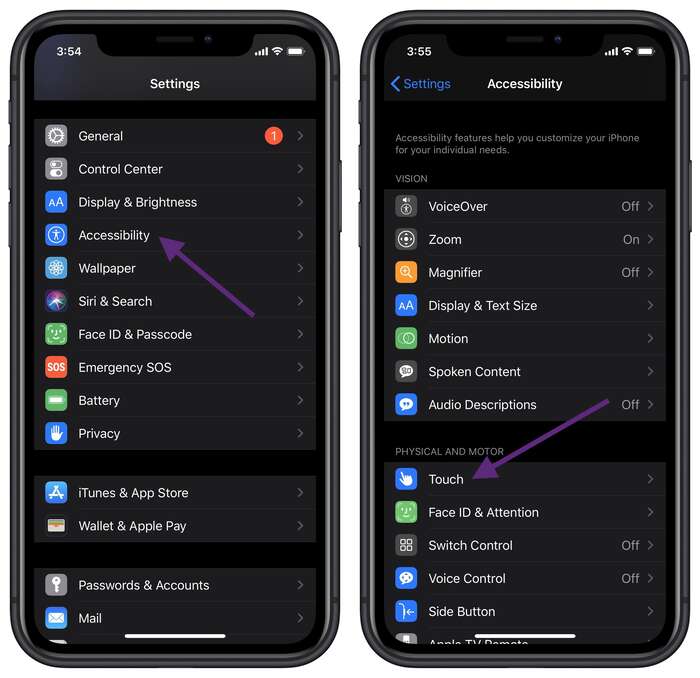
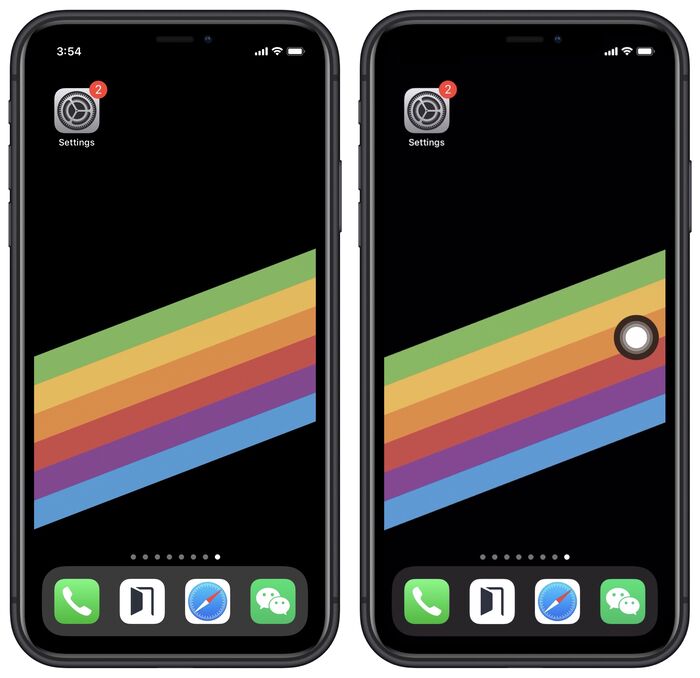
STEP 2. Then go to [AssistiveTouch] and turn on it, then the little white dot will appear.
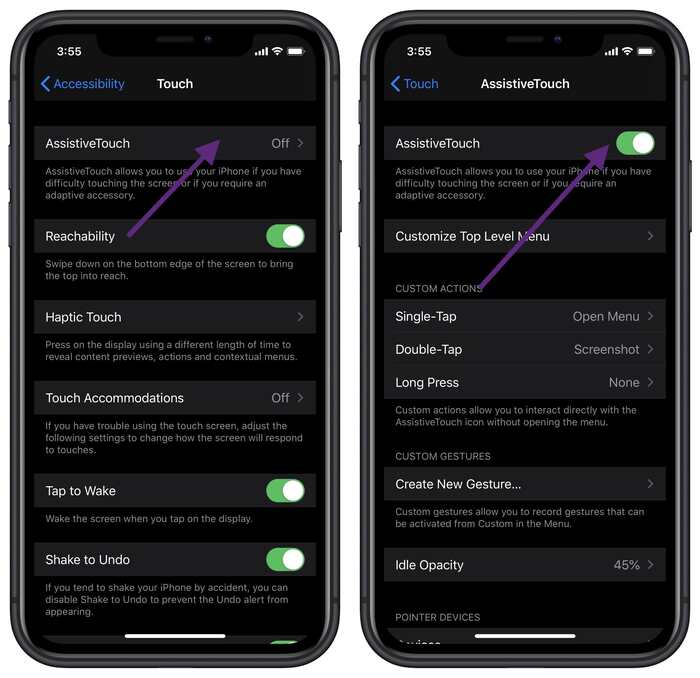
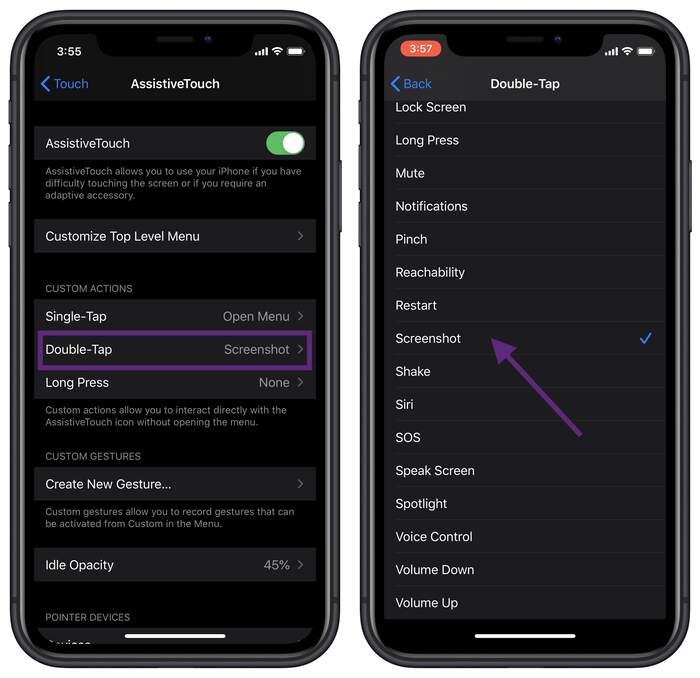
STEP 3. Now we can choose to use the CUSTOM ACTION of screenshot. It is suggested that you can choose to Double-Tap, enter the settings of Double-Tap and check Screenshot. Now you can tap twice of small white dot - [AssistiveTouch] to capture a screenshot in any interface of your iPhone X/XS/XR/11.
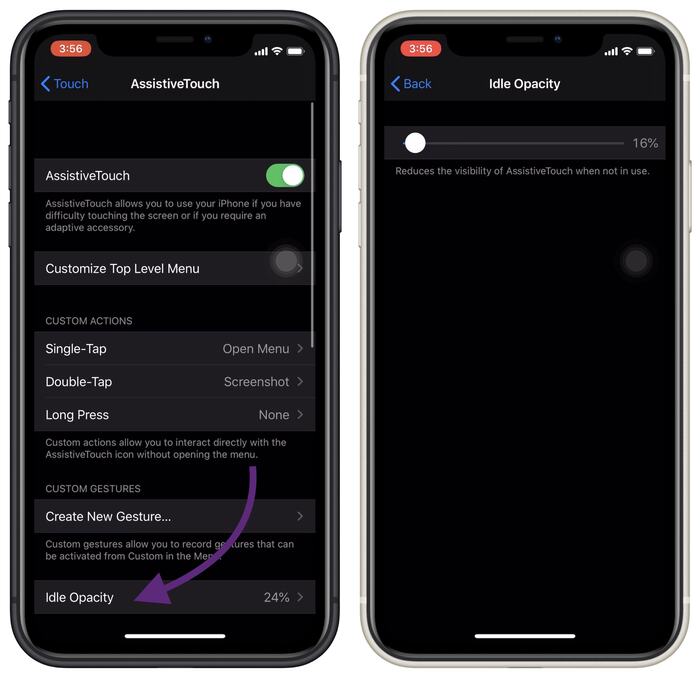
Do you think it's over? Of course not! The early [AssistiveTouch] is the most criticized point by users, which is to form a striking block area on the screen. But now, you just need to tap the "Idle Opacity" in the [AssistiveTouch] to adjust the visibility of the small white dot -- [AssistiveTouch] to a nearly transparent level! If you want to grasp these functions, quickly set up the AssistiveTouch in your iPhone and experience the pleasure by one hand!
Tips for Restart:

Leave a Comment
* By clicking “Submit”, you agree to our terms of service, privacy policy and cookies policy.