3 Ways to Take a Screenshot on Mac

Many users are easily confused by a variety of screenshot Apps in App Store. If you just bought a Mac or still have a little idea of how to take screenshot on macOS X, take a look at these screenshot tips and related software recommendations that I have summarized for you.
Did you know that screenshots can be captured on a Mac in three different ways, and the new version macOS even makes screenshot feature much easier. Therefore, you can capture different types of screenshot on Mac, and we also provide a detailed description of how each screen capture method on Mac works. Check below!
Way 1. Take a Screenshot on Mac with Keyboard Shortcuts
Take an Entire Screen Screenshot
Take a Partial Screen Screenshot
When you move the cursor (click and drag with the mouse or drag with three fingers on the touch pad) to select the capture area, there will be an instant change in the length and width of the pixel value on the side. Then release the gesture (or mouse) after confirmation and the screenshot can be completed.
Similarly, this operation is named as "screenshot + date" and automatically saved to the desktop in. PNG format.
Take a Window Screenshot
The cursor will automatically become a camera icon, at this time, all areas are in the mask state, move the cursor to the target window and click to complete the screenshot.
If you don't select any window, just place the cursor on the desktop, and click it to automatically capture the image of the whole background wallpaper. Note that it is the background wallpaper. Similarly, this screenshot is named as "screenshot + date" and will be automatically saved to the desktop in. PNG format.
If your Mac hasn't been updated to or doesn't support for updating to macOS Mojave, just use the shortcut key above to take a screenshot. If you capture the screen by recording them into a short video clip, it's suggested that you can download professional screen recorder(professional screen recorder software has been introduced in the third part), or you can also update the system to macOS Mojave and take a faster screenshot according to the second method below.
Way 2. Take a Screenshot on MacOS Mojave or Later
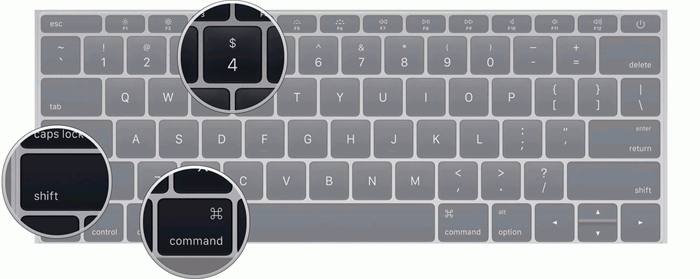
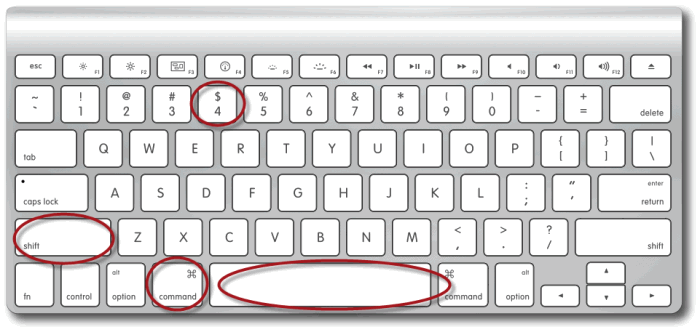
When your system is updated to macOS Mojave or newer one, it supports users to press shift-command-5 to activate the screen recording tool at the same time. In addition, this feature also supports screenshot function. Unlike the older system, you need to press different shortcut keys for using.

Use the keyboard shortcut command + Shift + 5, the screenshot application is located near the bottom of the screen, as shown above. The screenshot application has convenient buttons that allow users to call the following types of screenshots with a mouse click: capture the entire screen, capture the selected window, capture a portion of the screen.
The tool also allows users to record the Mac screen. The recording options are as follows: record the entire screen, record a portion of the screen. Keep in mind that the macOS Mojave screenshot application UI would not appear in the screenshot you take.
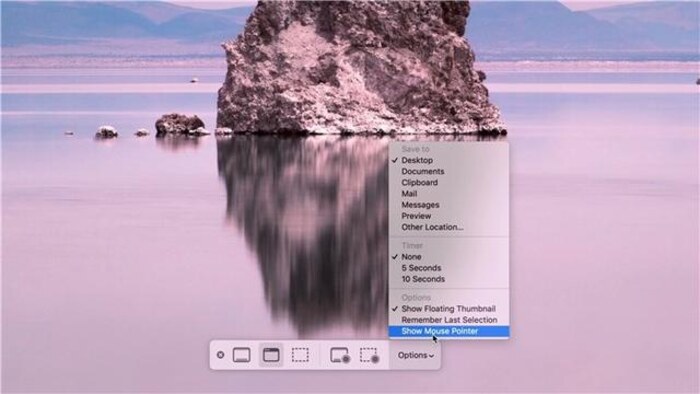
NOTE: In addition to screen capture and recording, there are built-in options which allows users to change the default save location and enable the countdown timer for a perfectly timed screenshot. There are also options to disable the floating thumbnail preview in the lower right corner of the display and remember the last option when using the screenshot utility again. Similarly, you can choose to hide or show the mouse cursor.
The above methods are relatively convenient and simple. If you have some advanced requirements, you need a professional screenshot software. Because professional software can not only provide you with simple screenshot or basic functions of recording screen, but also let you more personalized the screenshot or recorded screen video. At the end of this post, we will introduce the professional software RecordAnyVid.
Way 3. Take a Screenshot with Screen Recorder
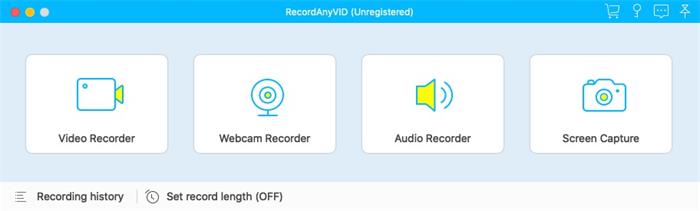
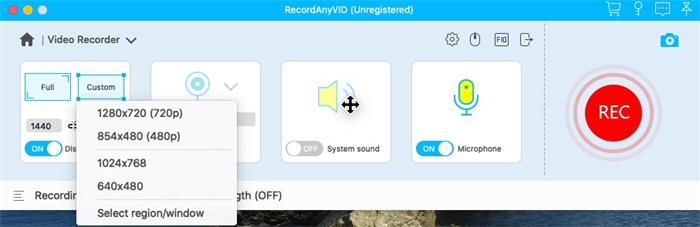
RecordAnyVid is a professional screen capture and recording software for Mac. It can record all activities happened on the desktop. In addition, it also supports real-time editing, and is able to output to video files in different formats. The interface of RecordAnyVid is simple and the operation is simple.
Other features of RecordAnyVid that are worthy mentioning:
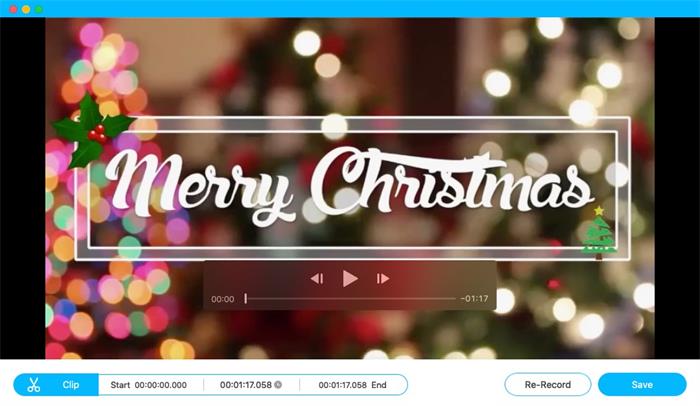
- Support real-time editing of video recording screen, and also support using advanced editing function to add video special effects after recording.
- Support recording streaming music, radio or online audio and save them to high-quality MP3/AAC/M4A/WMA audio track.
- Enables you to capture snapshots of particular screen areas.
- Support setting up the hotkeys to start/stop record, open/close webcam, take snapshot, etc., so you can use the software to record screen conveniently.
There are more easy-to-use functions not listed one by one. It is recommended that you can directly download RecordAnyVid and try it. If you need to refer to the specific operation steps, you can continue to read.
Note: As soon as you select the Screen Capture, start grabbing the screenshot. You can edit the screenshot and finally click [Save] to save the image.
You can choose the most efficient method according to your own need. If you think the recommended methods and software in this post are useful, you can share them with your family and friends as well. Thanks for your support!

Leave a Comment
* By clicking “Submit”, you agree to our terms of service, privacy policy and cookies policy.