[Solved] How to Record Your Computer Screen with Webcam

Part 1. Why Choose RecordAnyVid?
If you want to record your screen, the first and probably the most direct way is to use your PC's built-in screen recorder. However, the downside of capturing your screen with built-in screen recording software is that you cannot record your screen and webcam at the same time. Fortunately, you can use a third-party software to record both your screen and webcam. RecordAnyVid is the right tool to help you get the job done easily and effectively.
Capture Your Screen Without Watermark
One of the reasons why RecordAnyVid is the top choice for recording from a desktop or webcam is that even the free version of RecordAnyVid lets you to make screen recordings with no watermark. This feature makes it a wonderful choice if you want to directly share your screen recording on video websites or social media.
An All-in-One Screen Recorder and Video Editor
RecordAnyVid not only supports you to record your screen and webcam but also enables you to do some editing after the screen capture phase. RecordAnyVid offers you many basic tools so that you can immediately trim, cut, split your recording, and change the video speed and volume. You can even add captions in your screen recording. This impressive editing feature basically makes RecordAnyVid stands out from other screen recording products available in the market.
Multiple Choice of Output Formats
As a powerful screen recorder, RecordAnyVid provides a range of output formats with users, including MP4, MOV, F4V, AVI, WMV and more. Besides, you can choose to save the recording as a GIF file so that you can easily share it on popular social media or forum, which is quite useful.
Part 2. How to Record Your Computer Screen with Webcam?
With RecordAnyVid, you can easily record your webcam and your screen with ease. Here is the complete guide to help you achieve this goal.
STEP 1. Download and Install RecordAnyVid.
Navigate to RecordAnyVid's product page, and then select a suitable version that is compatible with your computer.
STEP 2. Launch RecordAnyVid, and Customize Your Settings.
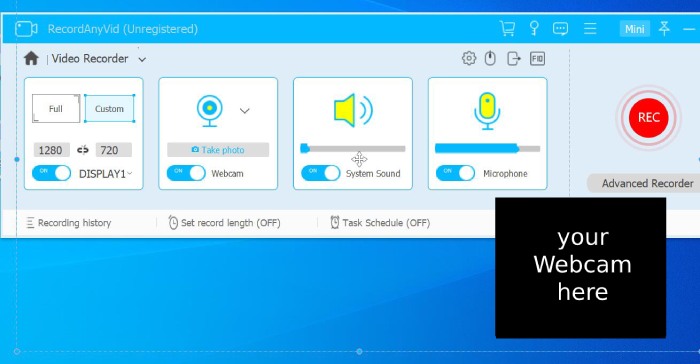
Once RecordAnyVid is successfully installed in your computer, launch the program and click in "Video Recorder". Before you start to record your screen and webcam, you can choose to record from your whole screen, a selected area, or a webcam.

Turn off "Display 1" and turn on "Webcam", then you can only record your webcam.

And if you want to record your screen and webcam spontaneously, just turn on both "Display" and "Webcam".

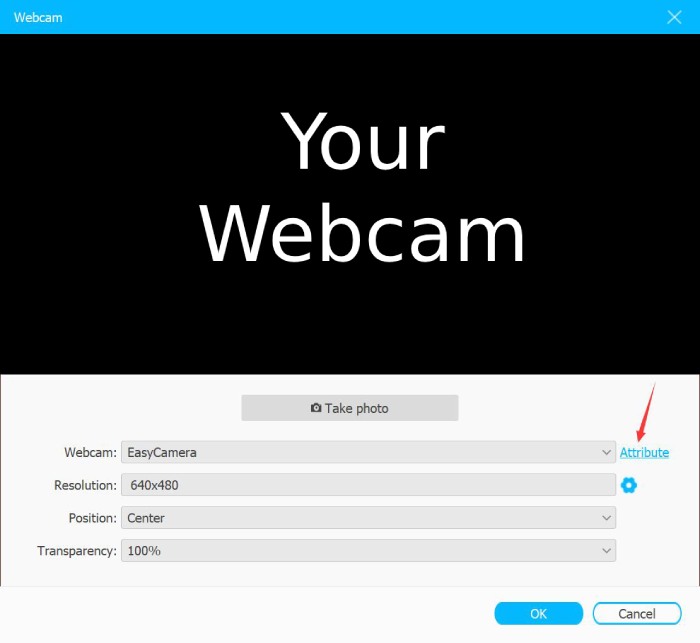
Click on the drop-down arrow menu on the right of the webcam icon, you can change your webcam settings. Here, you can also take a photo with your webcam. And click on the gear icon, you can change your webcam video frame rate and output size.
STEP 3. Start to Record Your Screen and Webcam.
After change your settings, click on the "REC" button on the right size, then you can record the screen and webcam. You can drag to move your webcam window to anywhere on the screen. Also, there is a drawing tool bar to let you make notes on the screen.
STEP 4. Edit and Save Your Recording.
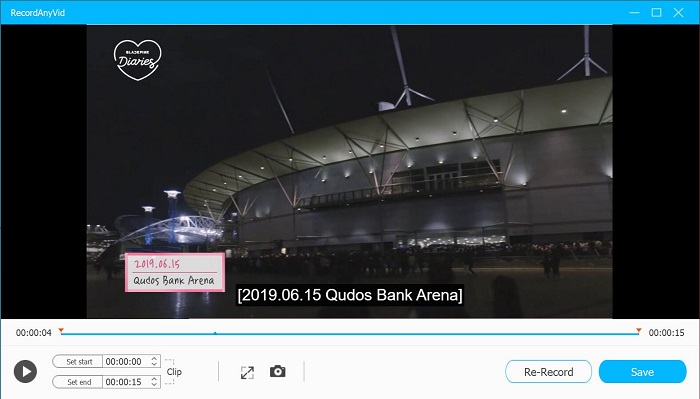
Once you've finished, click on the stop icon on the tool bar, your recording will appear in a simple editor, where you can crop and trim it suit your needs. Then click on "Save" to export the screen recording to your selected output folder.
Conclusion
Now you've got all the information about how to record your screen and webcam at the same time. Among all the advantages of RecordAnyVid that I've mentioned above, RecordAnyVid also has a scheduled recording feature, which means you can start your screen recording at a specific time. Quite impressive, right? Just try this brilliant tool to start making your first gameplay video or reaction video, and the output file is no watermarked!
Leave a Comment
* By clicking “Submit”, you agree to our terms of service, privacy policy and cookies policy.


