


How to Easily Record Overwatch Gameplay Videos on Computer

Overwatch is one of the most famous FPS games around the world. Players can experience their past Overwatch games from a whole new perspective with the Replay feature, which available on the Overwatch Public Test Realm (PTR). It allows players to watch their previous matches from any vantage point. However, Overwatch currently does not have any function to save and convert the playback of the entire match into an MP4 format for sharing. To save the gameplay on your computer, you need the help of a powerful screen recorder – RecrdAnyVid.
Part 1. Best Game Recorder to Save Your Overwatch Highlights
RecordAnyVid is an assistant that can not only help players save Overwatch highlights, but also the whole gaming match from its beginning to end. In fact, RecordAnyVid is not a recording software specifically designed for games. It also provides audio recording, screenshots and other common functions to capture any screen activities you need.
RecordAnyVid is one of the best tools for recording and sharing what's happening on your screen. With a simple and easy-to-understand interface style and operating procedures, it becomes one of the most suitable recording software for novices. The main user interface is organized into only four sections: Video Recorder, Audio Recorder, Screen Capture and More. In addition, it has many small functions set up to provide users with a more customized recording experience.
1. Recording Area Customization
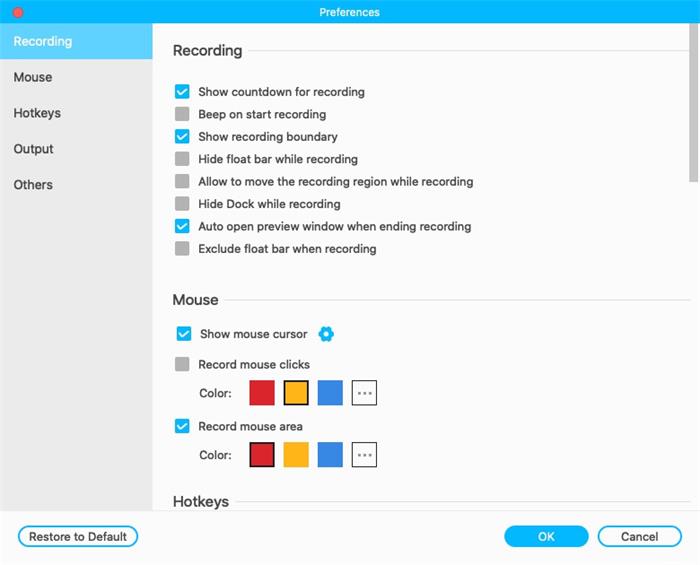
2. Mouse settings
Users can customize whether to show the mouse cursor, click, and area during the recording in this setting. It would bring convenience to those who need to record a video tutorial.
3. Hotkey settings
Part 2. Simple Tutorial to Record Overwatch Gameplay on Computer
Thanks to the simplest design of the interface of RecordAnyVid, both new users and professional users can easily master it quickly. The following steps will give you an overview on how RecordAnyVid works to help record Overwatch gameplay.
Step 1. Open RecordAnyVid that has been installed on your Windows or Mac and run the Overwatch at the same time.
Step 2. Enter the Video Recorder and select the area for fitting the Overwatch gaming window. Also customize the volume settings as well.

Step 3. Click the "REC" button of the video recorder while viewing and then navigate to Overwatch for starting the game. Then the recording will start after the three-second countdown.
Step 4. Now please wait for the Overwatch gameplay to end. The moment it is ended, you can stop the recording immediately. Then you will be turned to the previewing window for checking the recording.
Note: You can also set the record length in the menu bar at the bottom of the interface to make the recording stop at exact timing.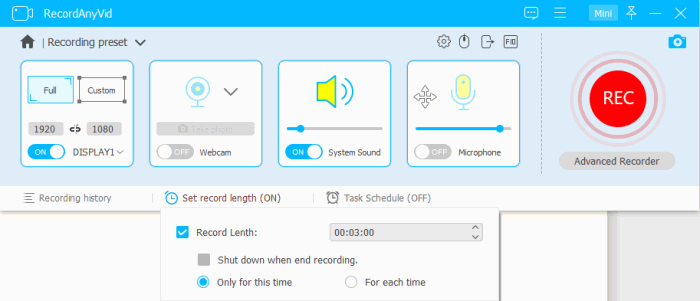
If you want to adjust the recorded Overwatch gameplay video by clipping or trimming it before saving, you need to upgrade to the registered version. In addition, for recording content more than 3 minutes, you should also use the upgraded RecordAnyVid.
Hope this guide can help you record your highlight moment in Overwatch video game!

Leave a Comment
* By clicking “Submit”, you agree to our terms of service, privacy policy and cookies policy.


