When you plan to create a video tutorial on desktop, the first tool you need to use should be a reliable screen recorder, which can help you capture screen activities without quality loss. As there are many options online, today we would like to introduce a reliable screen recorder for Windows 10. Keep on reading and get it!

Part 1. Recommendation: Best Screen Recorder for Windows 10
On the Internet, there are many recommended screen recorders. However, we don't have sufficient and transparent information to identify which is/are the best. But don't worry! Our recommendation, RecordAnyVid, will be trustful.
RecordAnyVid is so powerful that you can use it to record any screen videos and audios simultaneously. Furthermore, it is totally up to you to customize a video recording area and its size, so you can limit or set the recording content in your videos. RecordAnyVid allows its users to output their videos and audios to various quality such as MP4, WMV, MOV, and AVI for videos and MP3, WMA, and M4A for audios. Additionally, RecordAnyVid is able to output any screenshot as PNG, JPG, or GIF format.

Taking its users into consideration, the RecordAnyVid designers provide a user-friendly and simple user interface to users in case that they have no time and energy to study how to use RecordAnyVid. Consequently, every word in RecordAnyVid acts an indication and instruction of the features/functions, which is easy to understand.
Some other helpful and smart features of RecordAnyVid are:
* Hotkeys/shortcut keys to activate certain operations without using the mouse while capturing screen on Windows;
* Mouse effect to show and track your mouse while recording;
* Real-time editing functions like drawing or adding texts and shapes while recording;
* Various outputted quality ranging from high to low;
* Video sharing to YouTube, Facebook, etc.
Part 2. How to Capture Screen Videos with High Quality on Windows 10
RecordAnyVid is widely used by different people of different statuses. Students use it to record online courses for further study. Businessmen use it to record meetings and conferences on Microsoft Teams, Zoom, etc. Teachers use it to pre-record their additional teaching materials and share them in class. So, this blog will state how to use RecordAnyVid in this part.
Step 1. Download and Install RecordAnyVid
Please download RecordAnyVid in the first place. Since we are using it to capture screen on Windows, so click on Download to download the right version for Windows. For Mac, press the corresponding button as well.
[Tips] Different Between Free Trial and Registered Version
1. The registered version offers users unlimited time length for recording and clipping video while the free trial limits users to record videos in a 3-minute time length;
2. The registered version also allows users to capture screen videos without watermarks while the free trial is not able to do that
3. The registered version allows to clip and trim recording in previewing window.
Step 2. Select Recording Area
After you have downloaded and installed RecordAnyVid on your PC, please double click to activate it. When you see the main feed of RecordAnyVid, please choose Video Recorder to preset the recording settings such as recording area, volume, etc..

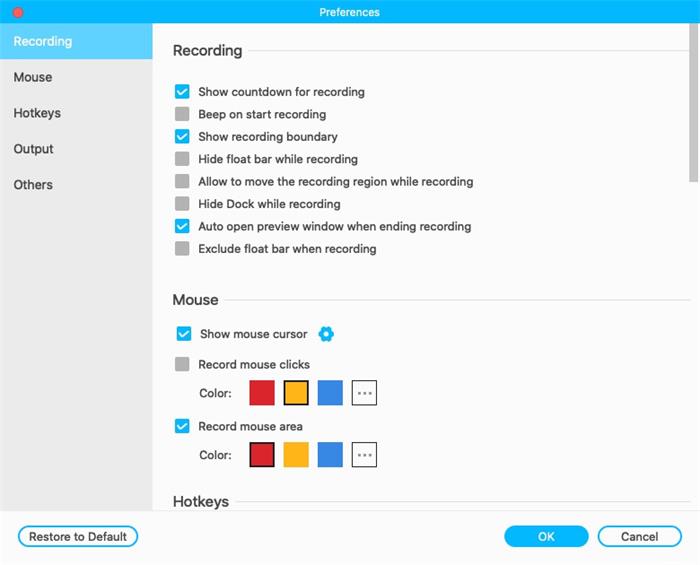
Preferences Settings:
After opening Video Recorder, you are able to change the Preference from the icons on the corner above Microphone. You can set more parameters or program usage settings here.

Step 3. Start Recording
Subsequently, you can tap REC in red to start recording. While recording, you can make real-time edition to your video. After you have finished editing and recording, you can tap the red dot to stop recording.

Step 4. Save and Share the Video
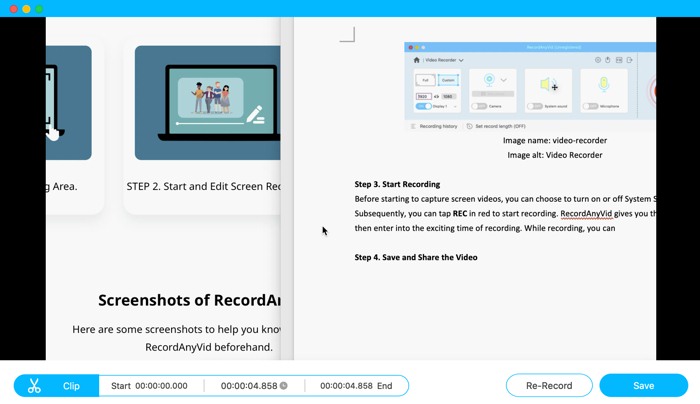
In this step, RecordAnyVid will save the video for you to preview. At this time, you still can clip the video or choose to re-record. If you are satisfied with the recorded video, please click on Save to store the video in any local folder. Also, you can click on the three dots in the right side of the video line to Share to YouTube, Facebook, and Twitter, etc.

Have you learned how to use RecordAnyVid? Is it easy to use as I mentioned? RecordAnyVid won't let you down because it has user-friendly features. What you need to for capturing screen as videos will be found on RecordAnyVid. Therefore, download RecordAnyVid now and be a video creator!


