How to Record iTunes DRM Protected Movies on Mac
Even you have purchased some movies from the iTunes Store, you will find that you still fail to share these iTunes DRM protected movies to your Samsung or other Android devices for playback. This mainly results from the DRM technology protection method added by Apple to protect the media content.
This situation can be annoying, especially when we want to play the iTunes DRM protected movies elsewhere. Fortunately, there are still ways to do so. Since the movie itself can't be shared, we can try to make a copy of it. For example, we can record the iTunes DRM protected movies down! So today, we'd like to share this blog with three simple, efficient and safe methods you can use to record iTunes DRM movies on Mac. Scroll down and read now!
Method 1. Best Solution to Record iTunes DRM Movies on Mac
RecordAnyVid will be the priority that I would like to introduce for recording iTunes DRM movies on Mac. This software is dedicated to record any screen activities on Mac with original quality. Therefore, it can be the best solution to record iTunes DRM movies as you don't want to lose any quality. The specific features of professional RecordAnyVid is as follows:
- Customize the recording screen or screenshot area freely. You can choose to record a full screen or select the specific area;
- Support multiple output formats: MP4, WMV, MOV, F4V, AVI, TS, GIF, MP3, WMA, AAC, M4A;
- Enable users to adjust the quality and parameters of the video/audio recordings;
- Consist of four main tools: Video Recorder, Webcam Recorder, Audio Recorder, Screen Capture;
- Freely enable or disable the system or microphone sound;
- Support adding text, arrow, and other elements to the recording by providing a drawing panel.
Now, you can follow this tutorial to record iTunes DRM protected movies with RecordAnyVid with less effort.
> Download on Windows < > Download on Mac <


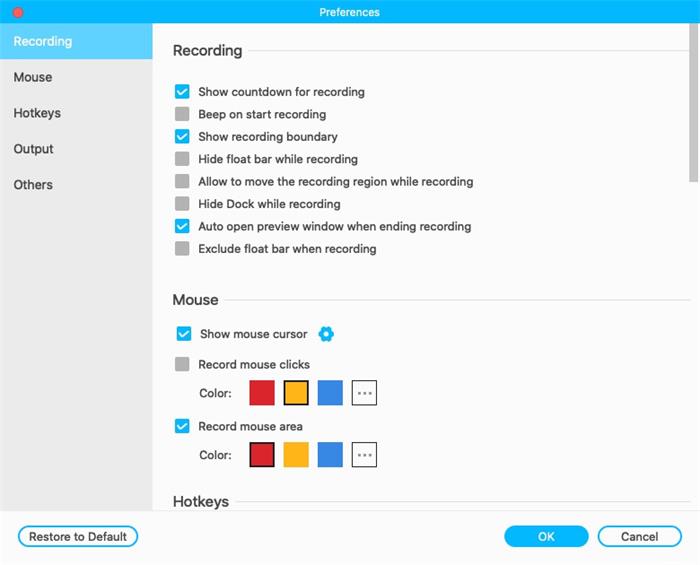

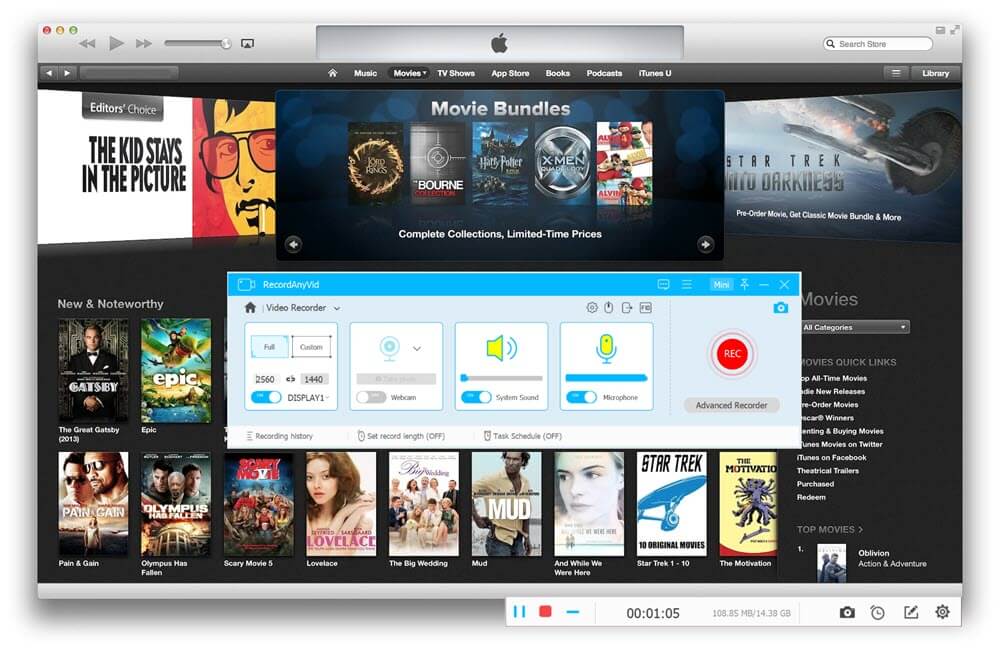
RecordAnyVid is such an easy tool to record iTunes DRM protected movies with high resolution. Moreover, it is available on both Windows and Mac systems with smooth performance, providing the best service to enable all users to record iTunes DRM movies without hassle.
Method 2. Record iTunes Movies with QuickTime
In addition to RecordAnyVid, you have more options to record iTunes movies on Mac. The built-in recorder of QuickTime is also many users' choice to record their Mac screen. Here is a brief guide on how to use QuickTime to record iTunes movies. Grasp it now.
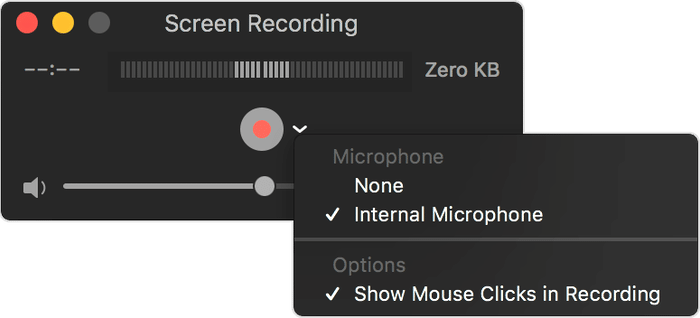
STEP 3. Play the iTunes DRM movie, meanwhile, click recording icon to start recording it. When you want to stop recording, click the stop recording icon in the top menu bar and you can save the copy of the iTunes DRM protect movie on Mac.
The problem is that when QuickTime is recording, there are not only system sound but also environment sound around the computer. The sound may not be clear enough. If you think it doesn't affect your viewing experience, you can try QuickTime. If your computer system has been updated to macOS Mojave, the way to record iTunes movies will be simpler. Let's have a look.
Method 3. Record iTunes DRM Protected Movies in macOS Mojave
In addition to QuickTime, another built-in reocrder on Mac can also be used to record iTunes DRM protected movies. After updated to macOS Mojave, this function will be activated and available. Now let's see how to use it.
STEP 1. Press Shift-Command (⌘)-5 on your keyboard to awake the recording tool.

STEP 2. Select the size of the recording area. You also click on Options to adjust more recording settings.
STEP 3. When the settings is completed,you can play the iTunes movie and click "Record" button to start recording the iTunes movie. To end the recording, you can directly press Command-Control-Esc.

By comparison, RecordAnyVid is a screen recorder that provides more comprehensive features. For example, you can edit the recording while the process is proceeding; output the recording to more formats with original quality; customize the quality and parameters of the recordings in your preferences. In a word, RecordAnyVid makes the recording totally customizable. So why not give it a try?
Leave a Comment
* By clicking “Submit”, you agree to our terms of service, privacy policy and cookies policy.


